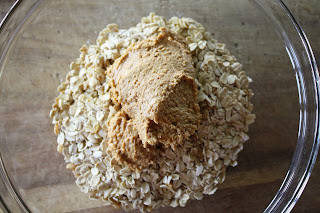
Peanut Butter Granola Bars
Makes 8 granola bar squares
Ingredients:
Oats, 1 cup
Brown rice cereal, 1 cup
Natural peanut butter, ¾ cup (my peanut butter is just ground up peanuts)
Maple syrup, ¼ cup
Butter, 2 T
Vanilla, 2 tsp
Melt butter. Add all ingredients together in a bowl and stir to combine.
Better Bonus Tip: Feel free to use honey instead of maple syrup.
Spread the mixture into a 2.2 qt (7.5 x 11 inch) greased pan.
At this point you have two options. First, stick in the fridge for one hour and you will have a great no bake granola bar. Second option is to bake them. They will get a little crispy and crumbly, so depends what you want. I did half and half. If you bake them, make sure to score them into squares before baking. Bake them at 350 degrees for about 20 minutes, watching towards the end to make sure they don’t burn since every oven is different. Very important to let them cool before messing with them or they will completely crumble to a mess!
Better Bonus Tip: Again, have fun with this. Other ideas for mix ins include cinnamon, nutmeg, different extracts, nuts or seeds, dried fruit, shredded coconut, chia seeds, flax seed, marshmallows, chocolate or cacao chips or powder, candies (I like UNREAL chocolates similar to m&ms), pretzel pieces, other cereals.
I personally like them straight from the fridge because they hold their shape and consistency better. This doesn't make them work great for a travel food though because the longer they are out of the fridge, the more they start to fall apart. I plan to keep experimenting myself because these definitely aren’t perfect yet. I think the more binders you add - basically sugary syrups - the more they stick together when baked, but I want to find the perfect balance, because don’t want them to be filled with sugar. I will keep you posted.
Update:
I made these last weekend and wrote the blog this week, in preparation for posting this morning. I was a little bummed how much the baked ones crumbled when we would use a spatula to take them one out of the pan when we wanted one. I had an idea last night, so got up this morning to try it before I posted. I decided to make another batch, score them and bake them on wax paper on top of a baking sheet instead of in the deep pyrex pan (as seen above). I scored them and separate them a bit, so they were still ‘together’ but not really touching. This actually helped! If you want the baked variety, consider trying this method instead of the pictured pan above. Either baked method, they all taste the same - just depends how pretty you want them :). I personally still like the unbaked ones a little bit better. You just get a different crispy texture with the rice cereal that changes when baked. See you next week!


No comments:
Post a Comment