I occasionally get requests for a topic to write about and this particular topic was born at my work. I have a coworker that is trying to eat less sugar and obtain sweetness in a dish in ways that aren’t typical raw sugar. I also have a coworker who is eating gluten free. Even if there isn’t a specific change you are trying to make, I would bet most of us try to eat healthy when we can. That is however, easier said than done. I have spent a lot of time doing research on some substitutions we can all make so we feel better about the choices we are making.
Personally, I think it is easy to say a substitution will truly be a substitution and you won’t notice. In fact, a lot of times substitutions completely change the way the dish tastes. I decided to put my research to the test. I love my mom’s banana bread, but there are a lot of things in that recipe that could be made healthier - lots of sugar, fat, cholesterol. So what did I do? I made two loaves of the banana bread - one with the traditional ingredients my mom uses and one with some healthier substitutions. Then I put a few people to a blind taste test.

Before we get to that, let’s talk about some recommendations for substitutions.While I do practice a lot of these, I do not/have not done them all. These are recommendations I have found after my own personal research. Do your own research to figure out what is important to you.
First up, general cooking substitutions:
1. Use two egg whites in place of one whole egg. I think the yolk has had a different reputation over the years - sometimes a good one, sometimes a bad one. I like to do a mix of egg whites and whole eggs.
Here is a link that shares some substitutions for eggs entirely, if that is something you desire.
Egg Substitutes
2. Use evaporated skim milk instead of heavy cream.
3. I always recommend using fresh citrus juice, but sometimes that just isn't feasible. If you need to use bottled, start with two tablespoons bottled when a recipe calls for one fresh lemon or lime. This is a hard one because the amount of juice you can receive from a fresh lemon or lime will vary by ripeness. If two tablespoons doesn’t seem like enough, you can always add one or two more later.
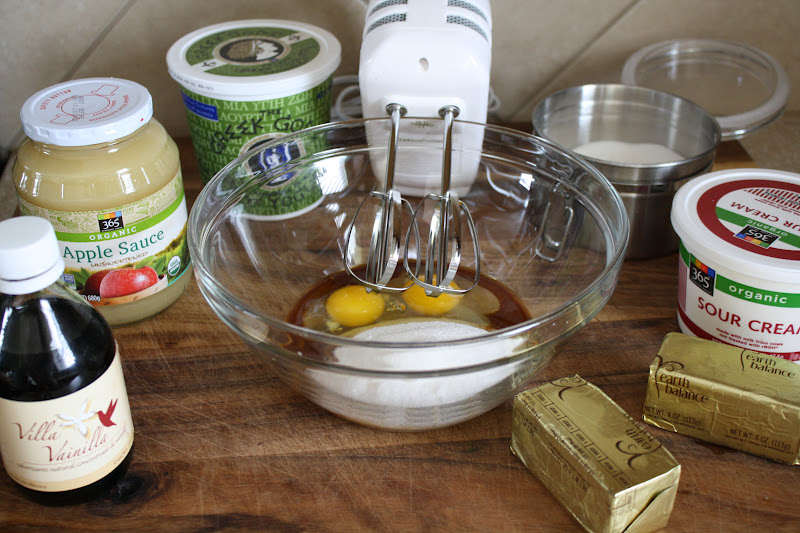
4. When a recipe calls for oil or butter, instead use half unsweetened applesauce and half the oil or butter. For example, if a recipe calls for 1 cup oil, replace with ½ cup oil and ½ cup applesauce. One stick of butter is typically considered a ½ c, so if a recipes calls for 1 stick replace with 1/2 stick (¼ c butter) and ¼ c applesauce. Some prefer to do a full 1:1 ratio, completing substituting with applesauce and not using any oil or butter. Try both!
5. Use plain greek yogurt in place of sour cream or mayonnaise when possible. Greek yogurt is higher in protein, lower in fat, carbohydrates, sugar, sodium, cholesterol and overall calories. Plus, yogurt is full of probiotics. Overall a healthier choice!
I use all brands of greek yogurt, but one particular brand, Chobani, has a conversation chart on their website for different substitutions using their product. Most of the time it is a 1:1 ratio, but not always.
Better Bonus Tip: I do this one quite often (as you probably notice in my recipes), but my friend in California shared one thing she does with greek yogurt that I can’t wait to try. Mix greek plain yogurt, with dried ranch powder mix, garlic salt and water until you get the consistency you want - great replacement for ranch dressing!
Now onto sugar substitutes:
I am not here to tell you which sugar substitute is the best. I simply want to share some different options. Do your own research as you are the only one that knows your goal in wanting to substitute.
1. Use agave nectar in place of sugar. Since agave nectar is liquid, the conversation isn’t straightforward. Try the equivalent of 2/3 part agave to 1 part sugar. If you do this, you will need to reduce the cooking temperature by 25 degrees. Additionally, you will need to decrease the amount of liquid and increase the baking time. Here are a couple of links for additional information.
How to Substitute Agave Nectar for Sugar
Agave Nectar Conversion Chart for Baking
2. Stevia is a popular sweetener right now. I personally have not tried it, but I do know it is a more concentrated sweetness. I have read that some say stevia is 300 times sweeter than sugar. There is a liquid and powder form and here is what they say the conversation should be, if using in place of sugar.
3. Splenda is still pretty popular as well and is a 1:1 ratio if you are using the no calorie sweetener. They do however have additional types of Splenda - sugar blend and brown sugar blend, so check out their conversation chart here.
4. If you aren’t wanting to use a sugar substitute per say, just trying to use less sugar, try using half of the amount of sugar that is called for in a recipe and add 1-2 tsp vanilla for added sweetness.
Additional, healthy recommendations:
1. Add ground flax seed to foods for extra fiber and omega 3. It is extremely easy to add to any baked goods, ground meat dishes, sauces, smoothies or sprinkled in yogurt.
2. With canned foods, use water or juice based instead of oil or syrup, whenever possible.
3. Use low sodium products whenever that option is available. Stocks, canned foods and condiments are the easiest to find in low sodium varieties. If you can’t find low sodium canned foods, rinse the food prior to using.
4. Buy plain yogurt instead of flavored and add your own flavors - blended fruit, honey, agave nectar, vanilla, powdered ginger or cinnamon etc. You will get less unpleasant additives and other ingredients, such as high fructose corn syrup.
5. There is a lot of debate going on right now about low fat vs. full fat. A lot of people feel the whole fat version is the best option because it is less processed and when a product is low fat the fat is usually replaced with other additives, sugar, etc. I do my best here - I don’t like milk to begin with and there is no way in haiti I will drink whole milk.
6. Use frozen in place of canned (of course fresh is always the first choice). There is less processing, preservatives and sodium in frozen varieties. Also, frozen foods are frozen at their peak to maintain freshness and nutritional value.
Now, to put some of these ideas to the test.
Below you will find the two recipes where I put some of these concepts to test. First, is my mom’s original banana bread recipe and the second one includes my modifications.
I have always grown up making banana bread with practically bad bananas. If all you have is still fresh you can use those, you just may have to work a little harder to get them mashed up and the banana flavor may not be quite as powerful. It takes about three bananas to equal the one cup the recipe calls for.

Mom’s Original Banana Bread
1 stick butter
1 c sugar
2 eggs
1 tsp vanilla
1 ½ c flour
1 tsp baking soda
½ tsp salt
½ c sour cream
1 c mashed bananas
½ c walnuts or pecans
Beat first four ingredients. Add remaining ingredients and put into a greased loaf pan. Bake at 350 degrees for 50 minutes. Let rest before removing from the pan.
My Banana Bread with Healthier Substitutions:
½ stick butter
¼ c applesauce
½ c sugar
3 tsp vanilla
4 egg whites
1 ½ c flour
1 tsp baking soda
½ tsp salt
½ c greek plain yogurt
1 c mashed bananas
½ c walnuts or pecans
Beat first five ingredients. Add remaining ingredients and put into a greased loaf pan. Bake at 350 degrees for 50 minutes. Let rest before removing from the pan.
The blind test:
Bread A was my mom’s traditional banana bread.
Bread B is my healthier version.
Changes included
- Instead of all butter, I used half butter half applesauce
- Instead of all sugar, I used half sugar and two tsp vanilla (my mom’s original recipe included one tsp already, so I used a total of three tsp)
- Instead of whole eggs, I used all egg whites
- Instead of sour cream, I used greek plain yogurt
The results:
Each person ‘tested’ was asked if they preferred one bread over the other. If they answered yes, they had to share the reason why.
Here is what they had to say:
Person 1 - Preferred A because it was sweeter.
Person 2 - Bread B was more moist, but prefers the bread to be a littler drier so liked A better.
Person 3 - Both were moist, but preferred bread A because it had more banana flavor.
Person 4 - Bread A because it was more moist and had more banana flavor.
My feedback:
Although not a blind test for me I have some feedback. I found the batter to be runnier in bread B, especially until the dry ingredients were added. Visually, you might have noticed, they looked a little different, but I didn’t think one looked more appetizing than the other. I also found the second one, bread B, to not be as sweet. Had I not had them side by side each other, I am not sure I would have thought the second was not sweet enough, but compared to the first, you could definitely tell a difference.
My thoughts in summary:
While each person said both breads were good, when asked to pick their favorite, all preferred bread A. I found it interesting though because they all stated different reasons why, including some contradicting ones - one thought A was drier, one thought A was more moist. Also, I found the banana flavor comments intriguing because I used the same banana batch in both breads. I guess this just proves everyone's taste is different. Does this mean substitutions are not really substitutions - instead change the flavor as I said above, maybe so?!
I made multiple substitutions in this recipe, which is a bit risky. I thought about trying to grind up oats and add in place of the flour for my gluten free friends, but that is a more complex substitution, so just stuck with some basics to start out. In addition, there were other things I could have done. I could have used all applesauce and no butter, instead of half and half. I could have tried something completely different in place of sugar, instead of just decreasing it and adding the extra vanilla. I guess the take home point is there are lots of things you can play with when trying to make substitutions. It will probably be a work in progress. You could take the one you are particularly focused on and work on making that change. There are definitely some substitutions that aren’t as straightforward as a 1:1 replacement, so you could continue to practice and master those, as it may vary recipe to recipe. I think we all can make healthier choices, so continue to experiment and find ways to make the best choices for you!
Let me know how it goes.
~Ashley