Friday, February 28, 2014

‘Stuffed Mushroom’ Chicken Tenders

Oh man, am I ready for warm weather!! March is just around the corner, but so is potentially more snow. I remember last year mid March we got a huge snow storm. I really really hope that isn’t the case this year. I am ready to get out and grill, take walks and just get some good old fashion vitamin D. I also can’t wait to watch my son learn about the outside and just take it all in. I think we are both getting a bit bored inside. You can only play with the same toys so often.


Speaking of my son, since he was born, my husband comes home for lunch just about every day now. Since I am working part time, about once a week, I try to make a special lunch. He doesn’t mind sandwiches, but isn’t it fun to eat something different besides sandwiches or leftovers for lunch? I think that is why most people end up going out to lunch, but eating at home is cheaper, better for you and we can control the ingredients. This week I made some yummy chicken tenders. I really like stuffed mushrooms so took those basic ingredients and decided to bread some chicken. This is kid and family approved - I hope!


‘Stuffed Mushroom’ Chicken Tenders
Makes 8 tenders


Ingredients:
Chicken tenders, 8
Mushrooms, 2-3
Onion, ¼ of a yellow or white variety
Garlic, 1 clove
Fresh parsley, 2 T
Grated parmesan cheese, ¼ c
Bread crumbs, ¼ c
Dried italian seasoning, 2 tsp
Egg, 1
Salt and pepper


Wipe mushrooms with wet cloth and remove stems. Finely chop until you have ½ c. Also, chop parsley and garlic clove.


Using microplane or grater, grate onion until you have ⅛ c.


Better Bonus Tip: If you don’t have a grater or microplane, you could just add some dried onion powder.


Add mushrooms, onion, garlic, parsley, cheese, bread crumbs, and seasonings to a bowl. Add egg to another bowl.


Melt 1 T butter (or oil) in saute pan over medium heat. Dip chicken tenders first into egg wash bowl and then coat in mushroom mixture.


Add four chicken tenders to pan and cook for 3 minutes, making sure not to move. After 3 minutes, flip and brown other side.  Once done, let rest on a paper towel. Add another tablespoon of butter and add next four tenders, repeating cooking instructions.


Serve as is, or make a simple honey mustard dipping sauce. Mix honey and yellow mustard with a 1:1 ratio. For these eight tenders, I did two tablespoons of each. I also added a splash of red wine vinegar, but that is optional.


Better Bonus Tip: You could use this same breading on chicken breasts. Since they are bigger, you will need to cook longer. I recommend browning in the saute pan and then finishing off in the oven so the crust doesn’t burn.

Hope you enjoy!


~Ashley


Friday, February 21, 2014

Slow Cooker 100% Whole Wheat Bread

Who has a bread maker? Not me. I have thought about getting one for a long time, but honestly I am tired of the amount of kitchen gadgets and appliances I have and trying to find room for them in my kitchen. I really have thought about it though. I have found it surprisingly difficult to find 100% whole wheat bread, that is both organic and only has a few recognizable ingredients. Because of that, I figured I would try to make my own. I am not a baker and actually really don’t like it at all, because you can’t just ‘wing’ baking. Everything has to be precise and exact. This combination didn’t leave me with much faith in being successful at baking my own bread BUT, I still couldn’t pass up this itching desire to try it. Then…..


I read this. Holy cow - make your own bread in a slow cooker (i.e. crock pot). Well, I do have one of those, so thought what the heck this is my chance. I knew the basics I wanted to put in my bread - salt, honey, butter, whole wheat flour and yeast. I also knew I wanted to use organic ingredients (the yeast isn’t). I searched the internet to do investigation on ratios, which varied quite a bit.  I just took a stab at my own recipe and gave it a shot.  I am not a bread connoisseur and I am sure there are things that could be better, but think this turned out pretty good, especially considering I only gave it one try. We always store our bread in the freezer and subsequently toast it when eating it, so we did the same with this bread. My husband has had a tuna sandwich and I had some peanut butter toast and we were both happy with it. Definitely will be repeating this. If you are like me, interested but nervous, I encourage you to give it a try.  Worse case you wasted less than a dollar on a yeast packet, because you probably had the other ingredients on hand in your house.


Slow Cooker 100% Whole Wheat Bread
Makes one loaf


Ingredients
Whole wheat flour, 3 ½ c
Yeast packet, 1 8.75 g packet (I used this brand because it said it was great for whole grains)
Water, 1 ½ c
Butter, 1 T
Honey, 2 T
Salt, 2 tsp


Melt butter and honey in saucepan over low heat.


Warm water. (I just stuck a glass measuring cup in the microwave for 1 minute). Do not boil, just needs to be warm.


Add yeast to water and stir to combine.


Add the butter honey mixture and yeast water to mixing bowl.


Add in 2 cups of flour and the salt and then use an electrical mixer and mix until combined. Gradually add remaining 1.5 cups, a half a cup at a time. Mix for 3-5 minutes on medium.

Better Bonus Tip: All of this can probably be done by hand, although I haven’t tried, if you don’t have a good mixer. You probably will just need to mix it longer, up to 10 minutes.


Flour a surface to roll a ball of dough. Don’t over mix! 

Better Bonus Tip: You could also try a 'log'. I might try that shape next time. 


Lay the dough ball on a piece of parchment paper and then lift into a slow cooker.


Cook on high for 1 - 2.5 hours. You want the dough internal temperature to be 190-200 degrees. Mine took 1.5 hours. (Pardon the unattractiveness of the bread. I asked my husband to check the temperature while I was feeding our son. He jammed the thermometer right in the center of the loaf - twice :)


If you want a slightly crispier crust, stick the bread under the broiler for a few minutes.


And voila - homemade bread with 5 ingredients (not counting the water)!


Better Bonus Tip: If I buy a loaf of bread, I buy sprouted grain bread, which you can read about here.

What do you think? Honest feedback….


~Ashley


Friday, February 14, 2014

Pasta Bar Party

I love to entertain! Every holiday season, for the past I don’t know how many years, my highschool friends and I get together - usually for a wine and appetizers party. Well this year, we wanted to keep the tradition alive, but I will be honest I was a little nervous. I hadn’t entertained since our little guy was born. I really wanted to do it, so needed to get creative so the time commitment wouldn’t be so heavy. This time I decided to ask others to help - more of a potluck, where as past years I have wanted to do it ALL. So, what I suggested to the group was ‘what about a pasta bar’? Everyone liked the idea. We started out with an appetizer and ended with homemade sweets, but for the pasta bar, here is what we did.


For the pasta bar, we had:
  • Whole wheat penne pasta
  • Chicken
  • Shrimp
  • Ground beef seasoned with dried Italian seasoning
  • Cooked red onion slices
  • Cooked chopped yellow onion
  • Cooked cherry tomatoes
  • Cooked sliced mushrooms
  • Oil
  • Balsamic vinegar
  • Traditional red pasta sauce
  • Parmesan cheese
  • Chopped parsley


Better Bonus Tip: After you make the pasta, toss it in some oil, so it doesn't stick together.

We also had a yummy salad to complement the pasta and some garlic bread.


As you would assume, each person could just build their pasta the way they wanted.


There are lots of other things I would consider adding to the bar next time, such as chopped garlic, spinach, artichoke hearts, meatballs, basil, pesto, feta cheese and much more. When I eat pasta, I don’t usually go for the spaghetti style. Instead I prefer light with veggies and oil and vinegar, whereas most others probably prefer the spaghetti style. That's the benefit of a bar - everyone can have the style they like!


I think the party turned out really good and allowed my stress level to not be high. Plus, we got to all hang out and enjoy each other and good food. I would definitely do it again. Sad, we missed some friends, but that's what happens as we all get older.


Better Bonus Tip: I made way too much pasta, but didn’t want to just toss it. I decided to see how it would freeze. I tossed it with a little more oil and added it to a large pyrex jar. When I thawed it a couple weeks later, it made an already easy pasta dinner even easier and it tasted completely normal.

What’s your favorite party meal?

~Ashley


Friday, February 7, 2014

Juicing 101

In the New Year, Better Choices post at the beginning of the year, I hinted at something new my husband and I are incorporating into our diets. It was actually my husband’s idea. So what are we doing? Juicing. Have you heard of it? We really like to watch food documentaries and recently watched, Fat Sick and Nearly Dead. In this documentary, they juice as a means of fasting. We knew that wasn’t our goal, but did find the health benefits to be something that we wanted to try to obtain. The documentary talked about how juicing supercharges nutrient intake. It is hard to eat as many nutrients as you could get from juicing, which I completely agree with. “Juicing is a process which extracts water and nutrients from produce and discards the indigestible fiber.  Without all the fiber, your digestive system doesn’t have to work as hard to break down the food and absorb the nutrients. In fact, it makes the nutrients more readily available to the body in much larger quantities than if you were to eat the fruits and vegetables whole.”


So lets talk the basics. To juice, you have to buy an appliance to do this. Basically you are taking fruits and veggies and putting them through this appliance to extract the juice, at a much better rate than you could do manually.


So what machine to buy? These are not super cheap, but we decided to veto Christmas gifts for each other this year and buy a juicer instead. There are two main types of juicers, cold pressed, also known as masticating, and centrifugal juicers. After much research, we decided to go with the cold pressed machine, specifically the Hurom. Cold pressed machines are a bit more expensive, but they don’t use heat to juice, so the nutrients and enzymes are maintained. Also, the shelf life of the juice is a bit longer. This was important for us, so we could juice a huge batch and then have it on hand for the following couple of days. Finally, the quantity of juice you obtain with a cold pressed machine is more than with the centrifugal machines. The one negative for us is you do have a higher pulp content with the cold press machines, but I will tell you what we do to help with this a bit further down.


What we do. We usually try one recipe a week and make a double to quadruple batch. My husband also likes to just experiment and use random things from our fridge. First, we wash the fruits and veggies. Then you need to chop the produce into the size that can fit through the machine, usually not needing to peel which is nice. I personally feel my husband spends more time than he needs doing this. The machines are pretty durable and stop when they can’t process the produce. Then you can reverse out. I tend to be a bit more liberal with the size. The juice will come out one spout and the produce scraps come out the other end. We then take the juice and pour it through a strainer into a very large mason jar to store in the fridge. The juicer strains a lot of the pulp, but we really don’t like pulp so do a couple extra strains. Supposedly, if you buy a centrifugal juicer, you will get less pulp and might not need to do these extra strains. The clean up, as with any appliance, is my least favorite part. One tip we have read is to run water through the machine after you are done. This does help.


Better Bonus Tip: We don’t do this yet, but one of our goals is to get better at gardening...I have lots to learn! When we do garden more, I want to compost. The produce scraps will be great for this.  


Controversy.  As with anything, there is controversy. Is this worth it? The time. The money. The health. Sure, you are needing a decent amount of produce to obtain the juice, but again I couldn’t sit down and eat the amount of produce that would be needed to consume the same amount of nutrients. As always, organic produce is best, but of course that increases the price even more. Consider at least buying organic with the dirty dozen, actually now known as the dirty dozen plus. We buy a lot of our produce from the wholesale club and plan to do the farmers market when they re-open in the warmer months. Both of these things help with cost reduction. Another controversy is juicing or blending? I say both.  Why does it have to be one over the other?  We still blend and do our morning smoothies.  If you must choose, the controversy lies with blending you keep the fiber and whole food, whereas juicing you lose that but you get much more intense nutrient concentration.


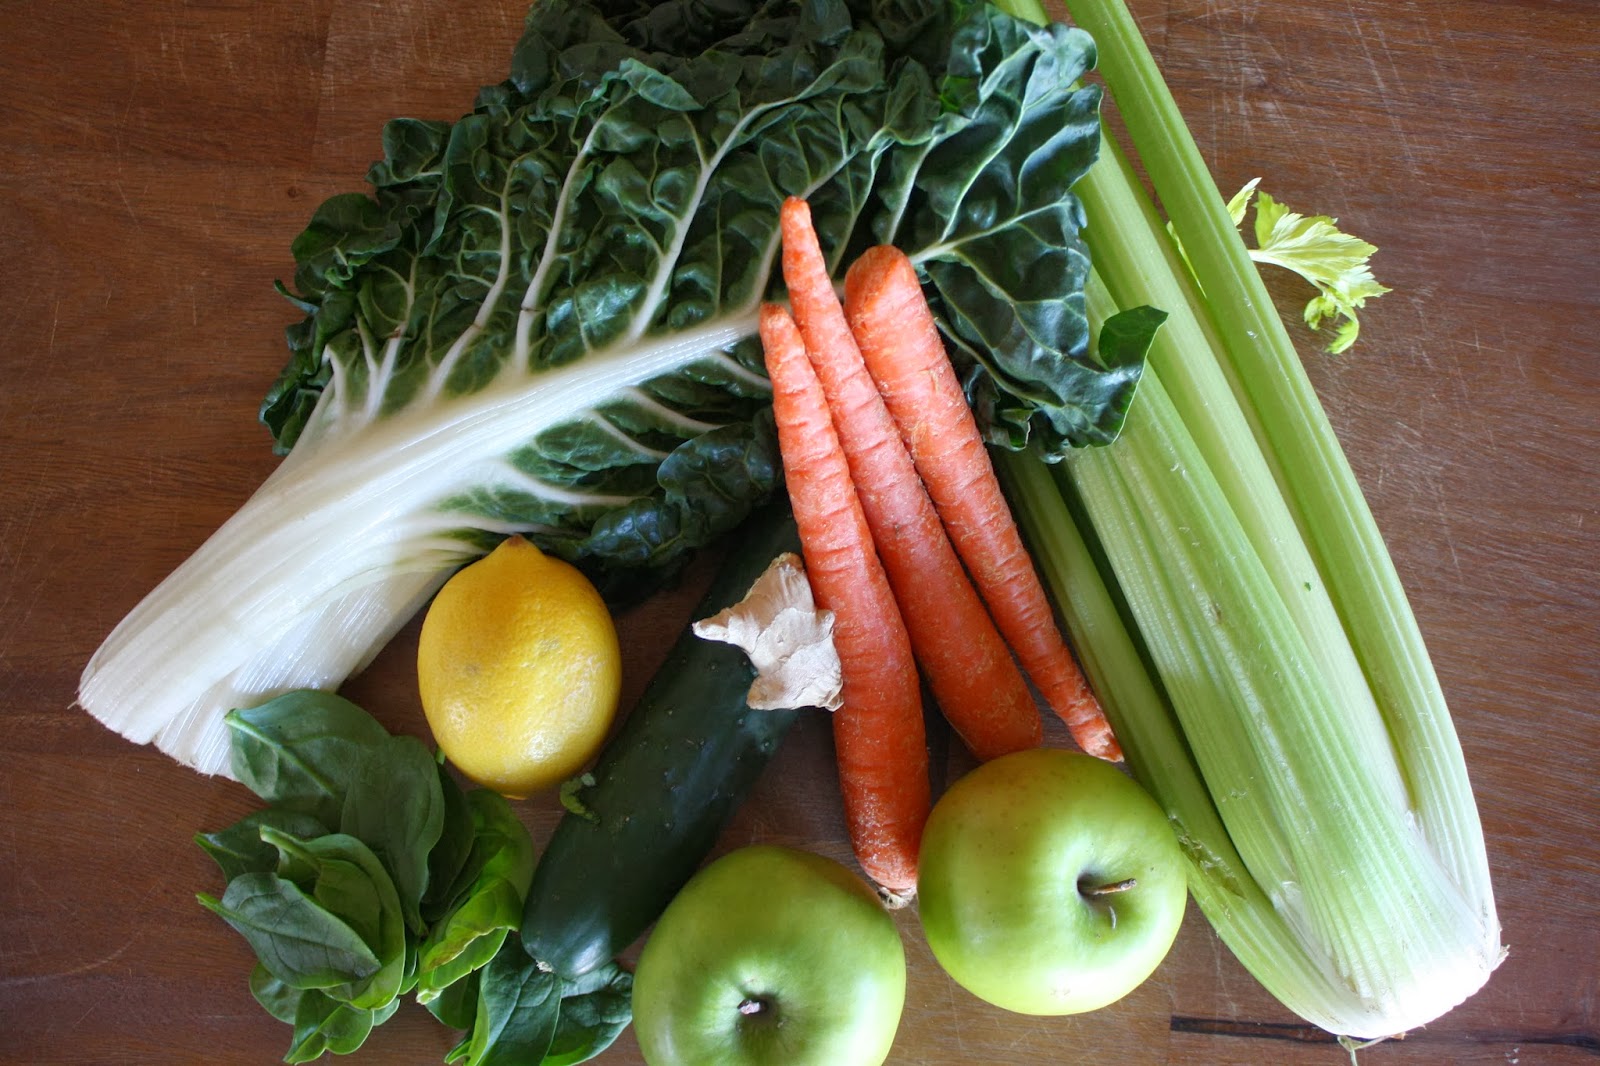
Tips. We find alternating produce while juicing works the best. The greens and celery have the hardest time in the machine, whereas the cucumber and apples juice the easiest. Also, alternating what produce you use each time is important. We end up with it all in one large mason jar so we can shake and infuse all the juices together and store in the fridge. Also, make sure to shake before each consumption.


Recipes. We have tried multiple and here are our comments. I found them all on pinterest. I did not site any, because there were multiple sources for most. The most popular and basic juicing recipe is a basic green juice. It consists of greens, green apple, cucumber, and celery. Optional add ins are lemon and ginger. I actually like it better than I thought I would. The thought of drinking greens sounds horrible (and the juices don't look great either), but the apple really balances it out. I am looking forward to doing a batch of fresh orange or apple juice soon.


ABC juice
Ingredients: 1 green apple, 1 beet, 2 carrots
What we did: 4 apples, 4 beets, 7 carrots (2 large)
Makes: little over 3 cups
Comment: creamy
Debloat
Ingredients: 1 cucumber, 3 celery, 1/2 lemon, 1 kale leaf, 1 green apple
What we did: 4 cucumbers, 1 bunch celery, 3 small lemons, 4 kale leaves, 9 apples
Makes: 8 cups
Comment: do kale at the beginning and / or alternate with others
Seasonal
Ingredients: 8 celery, 2 cucumber, 2 carrots, 3 sweet potatoes, 2 pears, 1 small piece of ginger
What we did: 1 bunch celery, 4 cucumber, 4 carrot, 5 sweet potatoes, 4 pears and inch ginger
Makes: 10 cups
Comment: strong sweet potato flavor
Iron and C booster
Ingredients: 1/2 cucumber, 1 c grapes, 1/2 c spinach, 2 kiwi, 1-2 c water
What we did: 2 cucumber, 4 c grapes, 2 c spinach, 8 kiwi
Makes: 5 cups
Comment: good balance of flavor and consistency
Red ravishing
Ingredients: 5 carrots, 1 beet with stems, ½ bunch celery, 1 cucumber with ends removed, 1 green apple cored, 2 inches of fresh ginger root, ½ kale bunch (optional), ¼ parsley bunch (optional)
What we did: 6 large carrots, 2 beets, 1 bunch celery, 2 cucumber, 2 apples, 1 bunch kale, 4 inches ginger
Makes: 6 cups
Comment: thick and bland
Heart healthy
Ingredients: 1 apple, 6 carrots, 5 kale leaves, 1 beet
What we did: 3 apples, 12 carrots, 1 bunch kale, 1 large beet
Makes: 4 cups
Comment: good balance of flavor
Stress reliever
Ingredients: 2 apples, 1 bunch spinach, 1/2 cucumber, 1 stick celery, 1/4 lemon, 1/2 inch
What we did: 8 apples, 4 handfuls spinach, 2 cucumbers, 4 celery sticks, 1 lemon, 2 inches ginger
Makes: approx 8 cups
Comment: good
Didn’t have a name
Ingredients: Handful of baby carrots, 2 apples, 2 handfuls spinach
What we did: one bag spinach, 2 handfuls of carrots, 4 apples
Makes: 2.75 cups
Comment: good and simple

Do any of you juice? I would love to hear your favorite recipes, tips, tricks, etc.

~Ashley