Friday, April 26, 2013

Steamed Whole Artichoke with Lemon Butter Dipping Sauce

Spring is here, well kind of. Seems to depend on the day. I am sooo ready for warm weather. I am definitely someone who's mood is affected by the weather, whether I like it or not, and I am just plain sick of the cold, rain and snow. I thought we were getting away without bad weather because the winter was so mild. In fact, winter just tricked us and started later. I really hope we don’t skip spring and head right to 100 degree summer temperatures. Only time will tell.


Spring and fall are my favorite seasons! Fall weather, sitting outside, grilling a few last times before winter comes. I also like spring weather, although doesn’t seem to be as dependable - this year proving that point! Spring gets me excited about farmer’s markets, attempting to garden, amazing produce. Well this past weekend one of my favorite spring produce made its debut - artichokes. Even better, they were on sale, so I picked up two.


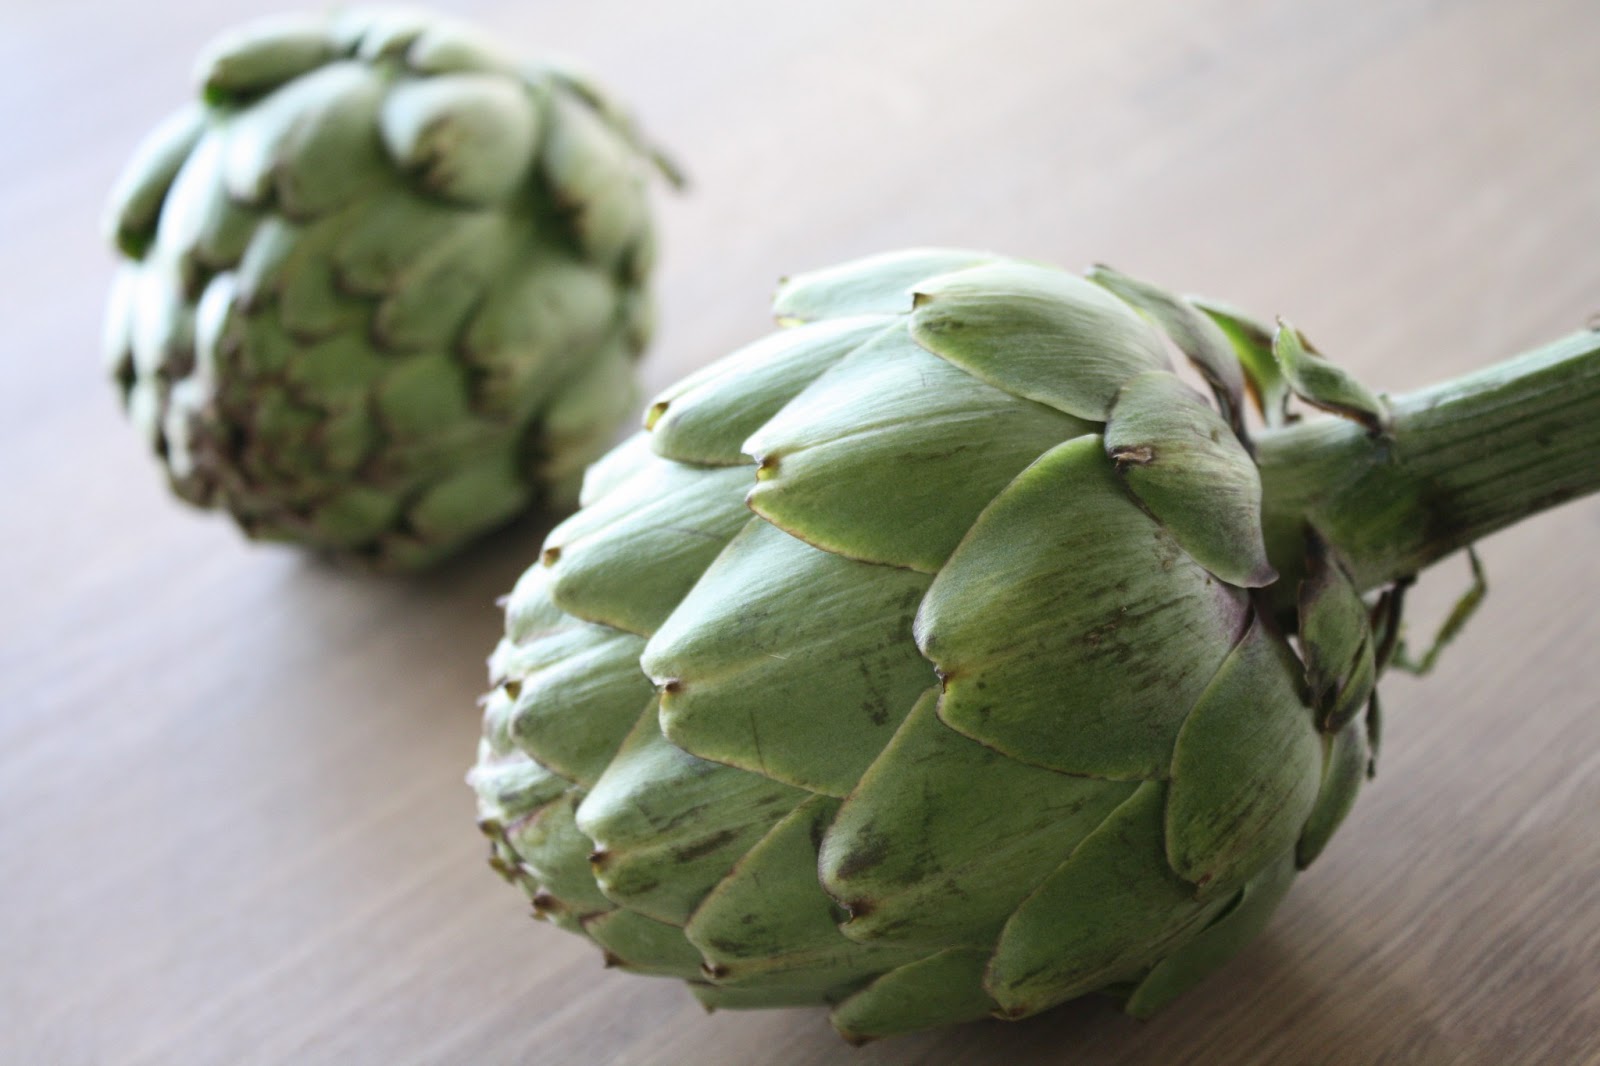
You can eat frozen artichoke hearts year round (also canned, although I always prefer frozen).   They are great in pasta, in salad, on pizza, made into a little sauce for chicken breasts, lots of optios. Zach and I also just really love whole artichokes streamed, so that is what I decided to do last weekend.


I bet most people find them intimidating, but I think you can do it! My most important tip is a good knife. Let’s get started.


Steamed Whole Artichoke with Lemon Butter Dipping Sauce


Ingredients:
Whole artichoke (or multiple)
Lemon
Chicken stock
Peppercorns
Bay leaves
Garlic
Coriander seed
Parsley
Butter

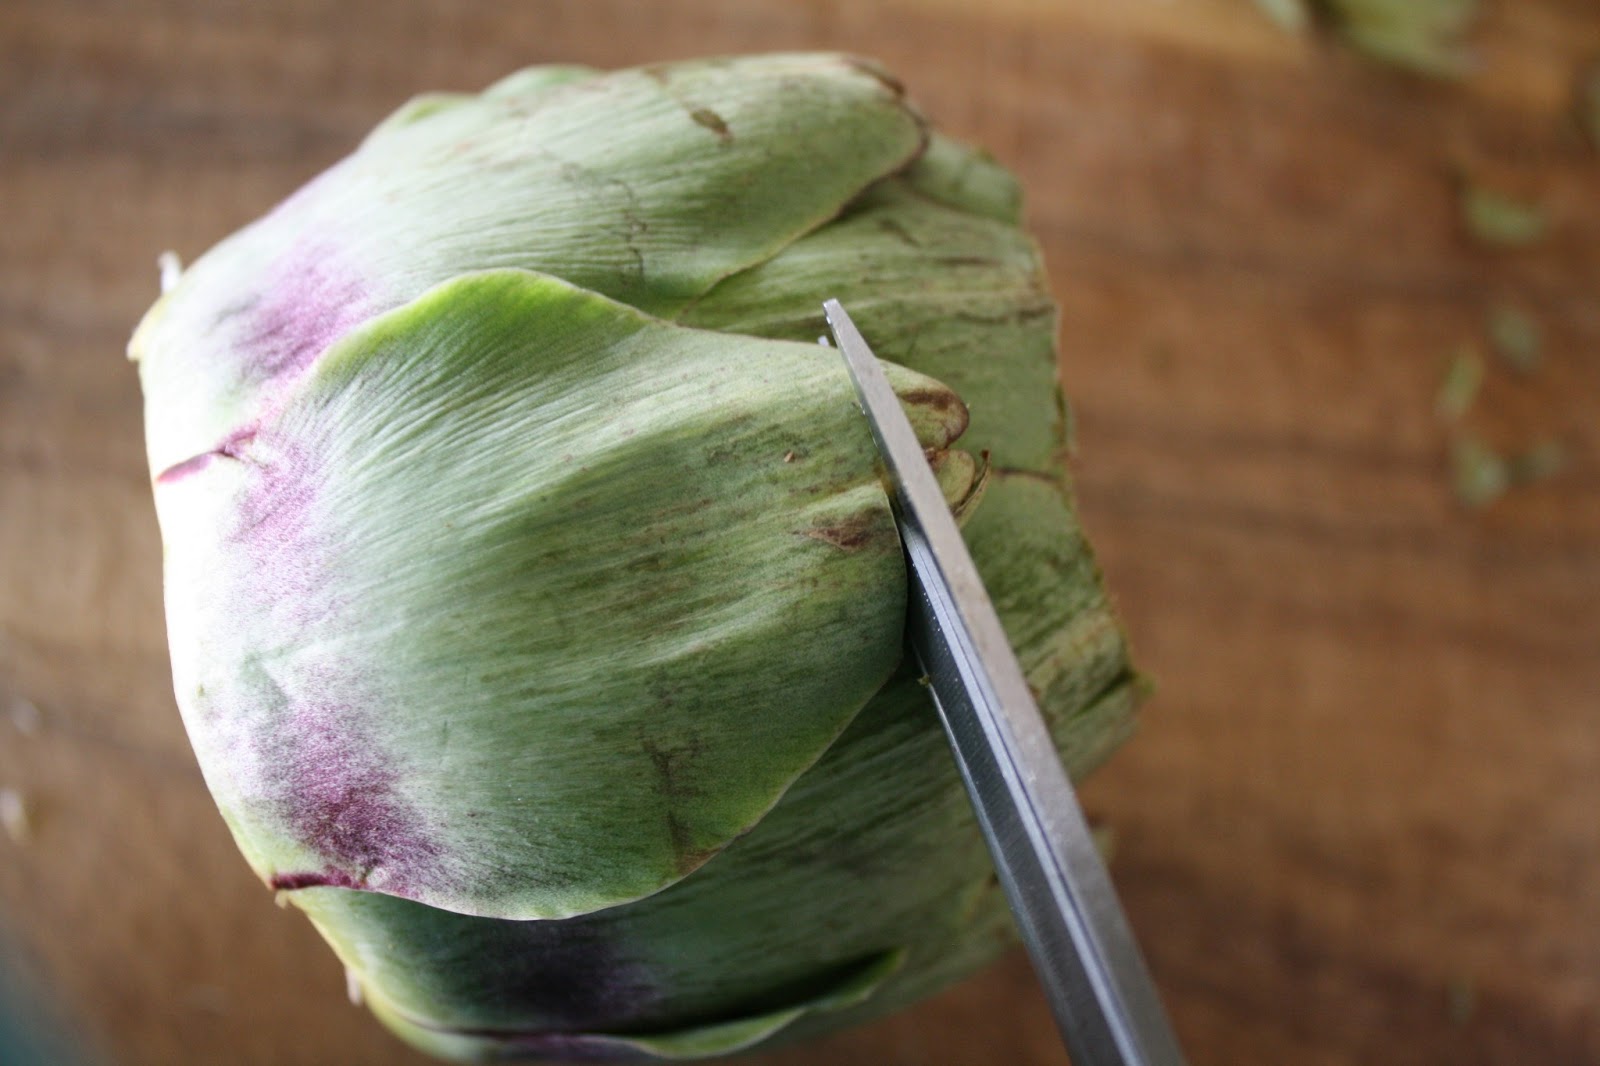
First up, wash the artichoke(s). Then use a good knife to remove the top one inch or so and the stalk/stem from the bottom. I think this is the hardest part, and again a good knife makes all the difference.


Better Bonus Tip: I find using a serrated knife works best.

Next, clip the tops of the leaves if you see prickly ones. You won’t eat this part of the leave, but you don’t want to poke yourself.


After they are prepped and ready, slice a lemon in half and rub half of the lemon on the artichoke top(s). This will give flavor, but also help preserve the green color.


Next, fill a pot with chicken stock. Add lemon halves (after squirting in the juice also), peppercorns, coriander seed, crushed garlic cloves (don’t mince, just crush the entire clove to release some flavor), a few parsley stems and couple bay leaves. I really didn’t measure here since it doesn’t really matter.


Better Bonus Tip:  I have also seen people just put the artichoke(s) in a steaming basket with water below in the pan. I prefer my method so you get lots of flavor.  Feel free to be flexible with your method, including the items you add. Use what you have or think sounds good.

Add the artichoke(s), bottom up into the liquid. Cover and simmer for 30 minutes. 


The artichoke is ready when you can pierce the bottom with a knife and remove it easily. Once done, remove from the liquid and let cool slightly. I like to eat mine warm, just not fresh out of the liquid because its too hot.


While the artichoke(s) is cooling slightly, melt 2 T of butter. Once melted, add juice from 1/2 lemon and stir to combine.


To eat, pull off the leaves individually, dip the lighter in color end into the lemon butter and use your teeth to scrape the meaty flesh.


Better Bonus Tip: I did intend to add garlic (or at least garlic powder) to the lemon butter, just forgot. Feel free to try the garlic addition. Also, other ideas for dipping sauces - mayo or yogurt, plain or with citrus and/or herbs. I personally haven’t tried either of these, but are also popular choices.

So all you foodies out there, cover your ears....I don’t eat the hearts from fresh artichokes. Honestly, I get too nervous. There is a layer of choke, which are the thorny like stringy pieces and are known to be a choking hazard. To get to the heart, you have to remove the choke and I just don’t do it. Feel free to give it a try!

When I made these last weekend, I got two and my husband and I each ate an entire one by ourselves - that was dinner...oops!! Oh well, they were delicious.

Think you can do it? I do! Enjoy and lets cross our fingers spring is around the corner and will stay in full force, so we can enjoy nice weather and fresh in season produce more frequently. 


~Ashley


Friday, April 19, 2013

Healthy Clean Kitchen (Home and Self/Family)

Monday, April 22nd is Earth Day. Earth Day is an international movement to protect the planet and secure a sustainable future. To me a sustainable future includes a lot of choices: the car you drive (yay for my parents, they just bought a hybrid), the food choices you make, the products you use, the way you run your household, work and life in general. The first book I read to help me get started making changes was The Green Book. I now make changes in my life constantly. With a baby on the way, my mind is now consumed with the best products to use for our baby, but I have to remind myself of my favorite quote from Robyn O’Brien: "The bottom line is that while none of us can do everything, all of us can do something.” This can be an overwhelming journey and remember my journey has been going on for years now, so don’t feel you need to change your entire life today or you will fail!

I hope this blog helps you make better choices, usually surrounded food. Today though, I am going to help you make better choices in keeping a clean kitchen. I will even expand a bit into the entire house including yourself/family. I have been making a lot of the products in my home for about 6 months. At this point, I am still experimenting and using other’s recipes. I spent some time researching and compiling a list of different recipes. There are TONS of websites out there. Some of the recipes included items I was not willing to purchase and some included processes that seemed too complicated to be able to manage long term. Today, I will share the recipe I use and my comments of each. Maybe by next year, I will have adapted these recipes into what I consider the perfect homemade product - because not all are there yet.

Few benefits of making own products:


  • Most importantly, you control the ingredients
  • You are avoiding commercial ingredients that are known to have harmful effects
  • It’s cheaper
  • Less energy to make
  • Less energy to transport to the store for purchase


Once again, the motto I continue to share is do what you can and want to do. Any change you make in your life is better than none.


Okay, so to get started, you need to purchase a baseline starter kit. You will find a lot of the recipes use the same ingredients over and over. I utilize Sams Club or Amazon to purchase most everything because I can do so in bulk to save money.  Plus, both places will deliver to my door. I did choose to also buy some cheap equipment, instead of using my good kitchen pieces and because I wanted to keep them separate since one was for food.


Here is what I purchased (or made sure I had):
  • Vinegar
  • Olive oil
  • Almond oil
  • Coconut oil
  • Distilled water
  • Baking soda
  • Washing soda
  • Borax
  • Alcohol
  • Hydrogen peroxide
  • Glycerin
  • Castile liquid soap
  • Castile bar soap
  • Essential oils
  • Beeswax
  • Cheap box grater
  • Cheap glass bowl
  • Cheap spoon
  • Cheap measuring cup
  • Spray bottles
  • Glass jars


Here is what we are currently making and using in our home:

Ingredients:
  • 1/4 c. rubbing alcohol (this is what eliminates the streaks)
  • 3 - 4 drops dish soap
  • Water — enough to fill the 16 oz bottle
  • 2 or 3 drops essential oil

Directions:
Mix all the ingredients in a 16 oz plastic spray bottle, give it a shake, and you’re ready to clean.

Cooking For A Better Tomorrow Comments:
I used my homemade dish soap (listed below). I doubled for a large 32oz spray bottle.

Ingredients:
  • 50/50 solution of water and vinegar

Directions:
Fill a 32 oz spray bottle.

Cooking For A Better Tomorrow Comments:
No streaks!!

Ingredients:
  • 2 c water
  • ½ c distilled white vinegar
  • 1 tsp pure castile soap
  • ¾ c hydrogen peroxide
  • 20 drops tea tree oil
  • 20 drops essential oil (lavender bathrooms, lemon kitchen)

Directions:
Fill a 32 oz spray bottle.

Cooking For A Better Tomorrow Comments:
I only do one type of oil - lavender. With all of my homemade products, I make sure to shake well before each use - this one in particular is important.

Ingredients:
  • All-purpose cleaner
  • Baking soda

Directions:
Spray with all-purpose cleaner, sprinkle with baking soda, scrub with a sponge/brush, then rinse clean.

Cooking For A Better Tomorrow Comments:
I use my all purpose spray from above.

Ingredients:
  • 1 c borax
  • 1/4 c vinegar

Directions:
Mix together in a cup then pour into toilet. Let sit for 15 min, then scrub.

Cooking For A Better Tomorrow Comments: 
I don't measure this, but felt like 1 cup borax was a lot, so use about half of that. Also, I didn't mix together the first time and a large ball formed in the toilet. This does the job, but you won't get the gel consistency of conventional toilet bowl cleaner.

Ingredients:
  • 2 c castile soap
  • 6 T water
  • 2 T vinegar or lemon juice
  • optional essential oils

Directions:
Mix in a glass jar.

Cooking For A Better Tomorrow Comments:
I use vinegar. This is more liquidy than a typical store bought product. I do think it works just as good though. Be cautious when pouring onto dishes, so you don’t use too much.  I double this and use citrus castile soap and no essential oils.

Stainless Steel Cleaner
Ingredients:
  • Oil
  • Vinegar

Directions:
Use a clean cloth with a little bit of oil and make back and forth motions with the grain of the appliance. Repeat with vinegar.

Cooking For A Better Tomorrow Comments: 
Works great! If the appliances are really dirty, use a damp rag first . To me this isn't really a cleaner, just eliminates the fingerprints and makes them look pretty.

Floor Cleaner
Ingredients:
  • 1 gallon water
  • 1 c vinegar
  • Essential oil, few drops

Directions:
Mix in bucket and mop onto floor. Make sure not to saturate floor.

Cooking For A Better Tomorrow Comments:
Safe on wood and tile floors.

Ingredients:
  • 1 bar of castile soap finely grated (makes about 1.5 cups)
  • 1 c borax
  • 1 c washing soda
  • 3-5 drops essential oils

Directions:
After finely grating the bar of soap, add it to a bowl along with the borax and washing soda. Whisk together very well to make sure it is all evenly distributed. Add the essential oils (if using) and mix very well to distribute the oil throughout. Put in an airtight container to prevent clumping.Use 2-3 tablespoons per load.

Cooking For A Better Tomorrow Comments:
I use a lavender bar of soap and no essential oils. This is the most tedious product I make. Honestly, it is silly, but I like the look of a glass jar with powdered laundry detergent. Likely, when our baby joins our family, I will be switching to liquid for ease.

Ingredients:
  • Vinegar

Directions:
Add to fabric softener laundry compartment.

Cooking For A Better Tomorrow Comments:
My husband was concerned the laundry would smell like vinegar, but it absolutely doesn’t.

Washing Machine Cleaner
Ingredients:
  • 1 ½ c of distilled white vinegar
  • 1 ½ c of baking soda

Directions:
Pour 1 cup of each directly into the drum. Then, add about ½ cup of vinegar and ½ cup of baking soda into the detergent dispenser.

Cooking For A Better Tomorrow Comments:
My laundry machine recommends doing this on a specific cycle and repeating every month.

Ingredients:
  • 1 c distilled or boiled water, cooled
  • 1/4 c castile liquid soap
  • 1 tsp. vegetable glycerine or glycerine
  • 15-30 drops essential oil

Directions: 
Mix all together and pour into a foam soap dispenser.

Cooking For A Better Tomorrow Comments:
I use citrus castile soap and no oils. This only works with a foam dispenser because of the consistency. I will be looking for a hand soap to use with a regular dispenser soon.

Ingredients:
  • 1/3 c sweet almond oil
  • 2 T coconut oil
  • 2 T olive oil
  • 3 T (2 T for pump use) grated beeswax (about 1-1/2 oz.)
  • 30-35 drops lavender essential oil

Directions:
Combine the oils in a small saucepan and heat over medium heat just until warm, about 5 minutes. Remove from heat and add the grated beeswax, stirring until the wax is completely melted. Refrigerate for 5 to 10 minutes to start the oils cooling, then stir in the essential oil (30 drops for less scent, 35 for more). At this point, the cream can be poured into a container (or two containers, if desired) to cool completely.

Cooking For A Better Tomorrow Comments:
I use citrus oil and tripled. More oily than typical lotions. You only need a very small amount which is good because it lasts a long time. It does soak in fast and your hands don’t stay oily. Next time, I am going to whip it with a hand blender.

Ingredients:
  • Two parts oil (try adding almond oil for added moisture or peppermint oil for a fresh scent)
  • One part beeswax

Directions:
Melt the beeswax in a double boiler, ensuring that the top bowl does not touch the water. Once the wax melted, remove from the heat. Add your oils and as much lipstick as you want (the more lipstick you use, the darker the color will be). Immediately pour the hot mixture into the desired tin. Let it cool overnight before using it.

Cooking For A Better Tomorrow Comments:
I use 2 T almond oil , 1 T beeswax and 1 drop peppermint oil. I multiplied this many times and made multiple small containers. I don't add lipstick colors.

Ingredients:
  • 1 c distilled, filtered, or boiled water
  • 2-3 drops peppermint essential oil

Directions:
Mix together in a clean container. Shake before each use. Do not swallow. Store in a dark cupboard or medicine cabinet.

Cooking For A Better Tomorrow Comments:
This may be an adjustment for people because you don’t get that strong alcohol flavor.


There is more I would like to do. I have other items I will be transitioning to, after I use up my conventional store bought products:
Room Freshener Sprays

If you aren’t ready to start making your own products, at least reference these two sites from the Environmental Working Group to see what is the best store bought products.


For a few other Earth Day inspired changes, check out my post from last year. I shared simple changes you could make in and around your kitchen. I ended that blog with a couple of goals I had for myself - one start composting and second to start using recycled paper products. While I haven’t starting composting, making my own products wasn’t a goal at that time and took over. I was able to start successfully using 100% recycled toilet paper and paper towels. We also now use cloth napkins most of the time. We do stock a few paper napkins and still are using up our current supply of kleenex. Once those are gone, I will be transitioning to 100% recycled for those as well. 

I hope I am leaving you with the motivation to make a difference, one small change at a time!

~Ashley