Friday, April 25, 2014

Taco Bell?

Oh man...before I started really caring about food and what I was eating, I L.O.V.E.D Taco Bell! I would even sometimes eat it twice a day during my highschool years. I really liked the tostadas - not what most people were probably picking off that menu I would imagine, but I loved them.  I would also eat their double decker tacos. Do you remember those? Basically a crunchy taco, with a layer of refried beans and all covered with a flour tortilla. So what to do when I stopped eating there? Well of course, just make my own double deckers. I have made the exact same version with the refried bean layer in between the shells many, many times, but this week I decided to do a healthier lighter version.


I love mexican inspired flavors, and I don’t mean the cheesy mexican that most love. I love the fresh avocado, cilantro, lime juice. I am always trying to find new ways to eat this flavor combo, but before we get to today’s meal with these flavors, I have a confession to make. I am super weird about cheese. I will eat a slice of cheese by itself or on a cracker, but don’t like cheese slices on sandwiches...although I will eat it a grilled cheese?? I also don’t like shredded cheese...not on my salads, mexican, baked potato… I know, so weird. I will do other cheeses on a salad - crumbled varieties, but no shredded. With all that said, I didn’t use any shredded cheese on these tacos, but feel free.


Okay, in full disclosure this week, while I don’t eat Taco Bell anymore, I can’t seem to get give up the sauce. I have no clue what it is, its nothing special, but I do really like it. I have friends at work that bring me sauce packets because they know I don’t go anymore. Good news is they also sell bottles at Walmart, so I don’t have to solely rely on my co-workers.


Okay, lets get started on these easy tacos!


Double Decker Taco


Ingredients:
Crunchy taco shells (I used blue corn)
Soft tortillas (I used sprouted grain)
Mexican seasoned meat (use your favorite seasoning or mine)
Avocado
Lime


Suggested toppings:
Lettuce, chopped romaine
Tomato, chopped (I used cherry tomatoes, just because thats what I had)
Cilantro, chopped
Shredded cheese
Sour cream
Favorite sauce or salsa


Lay out the soft tortilla. If using a larger burrito tortilla size, you will need to use a paring knife to cut the soft tortilla to fit the outside of the crunchy shell. If you are using the taco size soft shell,  you probably won’t need to do this. To cut to size, lay the crunchy shell on the soft tortilla and drag your knife around the edges. Then fold the crunchy and soft shell over and fully cut out the soft shell.


Better Bonus Tip: If you have tortilla scraps, don’t toss them - make homemade chips (see below)


After they are sized, warm them up a bit and set aside. I just popped mine in the microwave for 20 seconds.


Mash your avocado and add fresh lime juice. I do a 1:1 ratio.


Smear the avocado mixture onto the soft tortilla and then wrap the soft tortilla around the crunchy shell.


Fill your tacos. I didn’t share measurements this week because it is really up to you how much or little of the ingredients you want to add.


Better Bonus Tip: Feel free to make this vegetarian and use black beans in place of the meat on the inside of the taco. Also, if you don’t like avocado, you could do a mashed bean layer in between the shells.


Thats it!


Now, onto those homemade tortilla chips I promised.


Homemade Tortilla Chips


Cut into any shape, drizzle with oil and bake at 350 degrees for 5-7 minutes. Flip and continue baking for another 3-5 minutes. Sprinkle with salt after removing from the oven and let cool.


Hope you enjoy this easy meal! Also, try some of my other mexican inspired dishes:


~Ashley


Wednesday, April 16, 2014

Ecofriendly Baby Life

Posting a couple days early this week because I will be unavailable Friday....

The focus of this blog is mostly food, but I also hope to help with overall health and wellness. Each year I try to devote a post around Earth Day (2014 celebration is on Tuesday, the 22nd) to eco-friendly choices you can make, in order to help live a more sustainable life - because to me that is part of living well. The first year, I focused on the kitchen. Last year, I focused on homemade cleaning and beauty products. Both of those posts shared things we are doing in our home, some of which have since been updated even more. I won’t get into that today, however did want to share the most recent eco-friendly changes we have made in our house...what we are doing with our baby boy! If you don’t feel like reading this, because it's baby focused, consider sending to anyone you know that is expecting or has little ones!


I do a lot of research. That is just the person I am. I know most people don’t care to do the research, so that has always been a reason I do this blog - to help share with others what I learn. I want to learn a lot about the choices we make, so to keep in line with that mentality, I spent a lot of time during my pregnancy trying to figure out what choices we wanted to make for our baby in regards to feeding, diapering, ‘beauty’ products, etc. Today, I wanted to share the decisions we landed on.


First up was what bottle to use. This took me A L O T of time. I just couldn’t make a decision. I knew I didn’t want to use plastic. That was easy for me. I know baby bottles can’t legally have BPA in them anymore, but I still have concerns with plastic. What was BPA replaced with? Something else that in a few years they will say is not good for us probably. Plus, as a general rule I try to go with the most natural products available. That left two options for me: stainless steel or glass. There were pros and cons to both. Glass of course has the potential to break, which is the worst part of these bottles. Also, they are of course a bit heavier. However, they are the most natural material and no chemicals can seep into the milk. The stainless steel option is lighter, not breakable, but some say there is still a risk of chemical leakage (especially nickel, chromium and iron) and with this option you can’t see the amount of liquid in the bottle, which would just have taken some time to get used to.  The other thing that was important to me with the bottle we chose was I wanted to be able to use different nipples, because you never know what your baby is going to like / need. Also, I wanted the bottle to be able to change into a sippy cup when he got older. I didn’t want to spend money or resources on multiple products. So what did we end up doing? The brand is called Lifefactory and the bottles are glass with silicone sleeves. The silicone sleeve helps prevent breakage and also helps with grip. We got 4 oz and 9 oz bottles and have been successful with their nipples (they have two stages), but have the option to use other brands if we would have needed.


We also got two things to turn these bottles into sippy cups. The company sells the sippy cup cap and then we got sippy cup handles, which are Chicco brand.


Finally, these bottles can turn into water bottles or snack containers down the line with the flat cap lid. 


We have been very happy with the decision. I also have the adult bottle, which I use constantly. I have dropped mine and it didn’t break, so so far so good on that!


As far as other feeding supplies, we use 1 cup pyrex containers to bring food with us when we go out (because he is eating real food now).


We also have lunch skins for bringing snacks with us.


Finally, we got two silicone bowls. I again, didn’t want plastic and silicone is as close to plastic as I like to get. I really liked this description of silicone I found on the website. I thought it was a great summary. “Silicone is an inert, rubber-like material that is safe, durable and pliable. Silicone, made up of silicon dioxide, or silica, which is a natural element present in organic materials like sand, quartz and rock. Silicon dioxide, and silica is transformed into silicone when combined with oxygen, carbon and hydrogen. Non-toxic Silicone is great for food storage and serving purposes because it is hygienic, hypoallergenic and resistant to bacteria. Silicone is known not to contain any toxic chemicals like those found in plastics (Bisphenol-A, lead and phthalates). And, silicone is known to not react with food or beverages.” As he grows and his needs change, I have other things picked out to continue on with non plastic choices.


After bottles, the next biggest decision was what diaper to get. I knew I wanted to do cloth diapers and my husband was surprisingly on board. I could do an entire post on this topic, but will try to just give a summary. I, of course did the research, and then presented my husband with a couple options. There are tons of different types of styles. The cheapest option is really a cover with some sort of a cloth or pad laid inside of a diaper cover. Then they have options where you can add a cloth or pad more securely into the diaper cover, either in a pocket or by a snap. Finally, they have diapers called AIO, all in ones.  The AIO is basically a diaper with all pieces assembled together. These look like a typical diaper, for the most part. This is the easiest option, but is typically the priciest. They also have diapers sized out by age and then ones that grow with the baby, by adjusting snaps. I really wanted one that grew with the baby, again because I don't like to continue to buy more and more stuff. I had a decision made on a diaper that had pads that snapped into place. The diaper cover grew with the baby and I just had to get different sized pads. All of a sudden it occurred to me if I had to buy all these different size pads, the price ended up being basically the same for the easy AIO diapers. The difference is I guess, the upfront cost vs the gradual buying of the pads. I figured for essentially the same cost over time, the easiest diaper would likely provide the most success for my husband, other family members, babysitters, etc. The last decision I had to make was the inside of the diaper and what material to get. They have different options and I decided to do half organic cotton and half stay dry, which is basically an absorbent pad. The organic cotton ones have the benefit of of course being organic cotton, but also the diapers are thinner. When the baby is really small, the stay dry is pretty bulky because of the thick padding. With the organic cotton diaper, the baby can feel the wetness, which some say helps with quicker potty training but of course you need to change more often. The stay dry is great for naps and overnight. I am glad I was indecisive and changed my mind to the AIO and did half and half. The brand we ended up doing is bumGeniusLast thing I will say about the diapers is the ones that grow with the baby typically don’t fit until 8-10 lbs, so you would need to consider purchasing newborn ones, doing a newborn rental or using disposables at the beginning. (The organic cotton one is on the left and the blue one on the right is the stay dry version)


When you cloth diaper, you do have to think about a few other things. The only other thing I have needed to get for the diaper itself is a doubler pad, which is basically a pad that you add to the diaper for extra absorbency down the line. It just lays under the two flaps of the stay dry diaper. Now that our son is sleeping 12 hours overnight, we needed this so he wouldn’t leak.


Also, we needed some wet bags. We have a couple for the dirty diapers and then a smaller one that has a ‘clean / dry’ spot for new diapers and a wet spot for the dirty diapers. This goes in our diaper bag.


As far as laundering, you can’t use any old detergent. Sadly, so many detergents have junk in them and they will break down the diapers, not to mention are harsh on your baby. Some homemade ones are also not recommended because certain additives don't work well with diapers - reasons I am not sure I completely understand, but just followed the 'rules'. We ended up choosing this one, which is easily accessible for us at Walmart, Costco, and Amazon.  The most frequently asked question I get is about laundering. What do you do with the dirty diapers? When the stool is still liquidy, the answer is you do nothing. Just simply put the dirty diapers in the washing machine. I do diaper laundry twice a week and then a sanitize cycle once a month. One the stools are more firm, you can just dump the contents into the toilet or they have sprayers, but I didn’t get one of those. One thing to keep in mind is the diapers can get stains from stool. If you line dry them outside, the sun will bleach them back to new, which is a great tip!


Okay, okay, one more thing on diapering, we decided to do cloth wipes as well (same company as the diapers). We have two squirt bottles, one with water and one with a soapy mixture to use to clean him up with the cloth wipes. If he just went pee, we don’t use anything. Here is the basic contents in the soapy spray, although this person makes actual wipes with it instead of just using the solution with reusable wipes.


I think we are both happy with the decisions we made in regards to diapers, both from an eco-friendly perspective (so much less waste!) and while the cost up front is more, we will end up saving lots of money, especially with re-use on future kiddos! Also, he isn’t exposed to any of the chemicals that are in conventional diapers. My husband has said many times, he doesn’t even think these should be called cloth diapers, because he and most people think of cloth diapers as the old school cloths and clothes pins :). If you aren’t on board with cloth diapers, consider a better disposable.


As far as ‘beauty products’, I did research on the various store bought products out there, but the best ones for a baby come with a hefty price tag. I decided to make his stuff since we make a lot of ours as well. He uses the same body wash and body lotion as we do. The body wash is a 1:1 ratio of mild unscented castile liquid soap and water and then some essential oils. Do your research on essential oils, as some aren’t recommended for kids and dilution is important.  Also, one thing to point out is the castile soap is not tear free. We have had no issues and were okay with that, because what actually makes most conventional baby soaps tear free is a numbing agent - no thanks!


For the lotion, I do a 2:1 ratio of shea butter to coconut oil plus some essential oils, whipped up.

For a diaper cream, I have been using this with some added tea tree oil due to its anti-fungal, antiseptic, antibiotic and antiviral properties. It isn’t a thick cream like what most would be used to but he has had a diaper rash and all I did was use this stuff and some open air and it went away. We now actually use it every day just to help prevent issues and for a nice healthy bottom!


Finally, I make some hand sanitizer to keep on his changing table and in our diaper bag.


Couple other miscellaneous things to mention. I am a nursing mother and in honor of less waste, I got reusable nursing pads. No reason to get the disposable ones and throw them away after each use. A lot of the time getting something reusable is better for your wallet, if the less waste reason isn’t enough to convince you. Just toss them in the wash and re-use. 

Also, I of course didn’t like the idea of freezing breast milk in plastic so opted for the 4 oz mason jars. Theoretically, these are more expensive than the plastic nursing bags, but are re-usable not only for more milk after you use up what was originally in it, but they can also be used for baby food, snacks on the go, beauty products (as seen above for his stuff), other adult uses (salad dressings, nuts, etc) after you are done breastfeeding. I just labeled with a piece of tape and a permanent marker the date.  


Hope you stuck through this long post! I know this isn’t food related and I’m sure doesn’t apply to a ton of readers, but please consider sharing this post with anyone you know that might be expecting a little one soon or has little ones!

As I have said many times on this blog, do what you can...one small change is better than nothing!


~Ashley


Friday, April 11, 2014

Kitchen Essentials - Part II

In 2012, I did a post titled Must Have Kitchen Essentials.  I thought it would be fun, two years later to do an updated post and share some of the things I use weekly, some even daily in my kitchen now. Everything in the original post, I still use regularly as well so make sure to check it out.


Standard cooking set up
So first up, is an update to one I talked about in the original post. I have always had a little spot next to my oven devoted to oil, cooking spray, salt and pepper. Today, my set up consists of extra virgin olive oil in a ‘drizzle bottle’, a mister oil spray instead of conventional cooking spray and coconut oil. Check out my post on making better oil choices for more information on the change up. I still have a pepper grinder and a sugar container filled with salt. Two new additions are honey and little mortar and pestle. I keep it all on a little wood cutting board.


Find the sugar / salt container here and the oil pourer here.


Pyrex
I have so many pyrex, all different sizes. I actually have a couple other sizes than what is pictures, but they were in use. These are my main sizes. I use these for leftover storage, lunches or freezer meals. I hand wash the lids, so they stay in good form and because heat and plastic don’t mix well. The container itself can go into the dishwasher.  The 1 and 2 cup ones are great for freezing freshly cooked beans or brown rice for easy meals.


Find here.

Snap glasslock containers
For items in the freezer that I use a lot, for example my frozen fruit for smoothies or veggies for quick side dishes, I have found these work better than Pyrex. If you are getting into the container frequently, the Pyrex lids don’t hold up very well.


Find here.


Glass jars
Have you picked up on the fact that I use a lot of glass? I really don’t like plastic in our house and have slowly tried to transition plastic out. In our kitchen we use a lot of stainless steel or glass. I have bought a few mason jars in a variety of different sizes and then keep a lot of jars from pickles, applesauce, honey, roasted red peppers, pasta sauce, etc on hand. My pantry is filled with these, along with my fridge.


Find mason jars here.


Glass and stainless measuring devices
Again, trying to wean from plastic, I use glass and stainless measuring spoons and cups. I really like these measuring cups because they have more than the traditional measurements of ¼ c, ⅓ c, ½ c and 1 c. You also get a ⅔ c and ¾ c.


Find the stainless measuring cups here and spoons here (although I actually received these as wedding favors - there are tons of options out there).


Glass pantry jars
You might remember these in my pantry sneak peek post. I buy them 50% off at Hobby Lobby and they are great for my pasta, rice, lentils, etc.

Spice jars
I got these as wedding gifts and use them for all of my dried spices I keep on hand to add flavor to cooking.


Find here.


Label maker
Yep, you heard me. I love my label maker. My husband actually is found with it many times also. This doesn’t technically live in my kitchen, but with all the food we keep in our freezer and all the random glass jars around our kitchen, we turn to the label maker regularly so we know what is in each container.


Find here.


Herb keeper
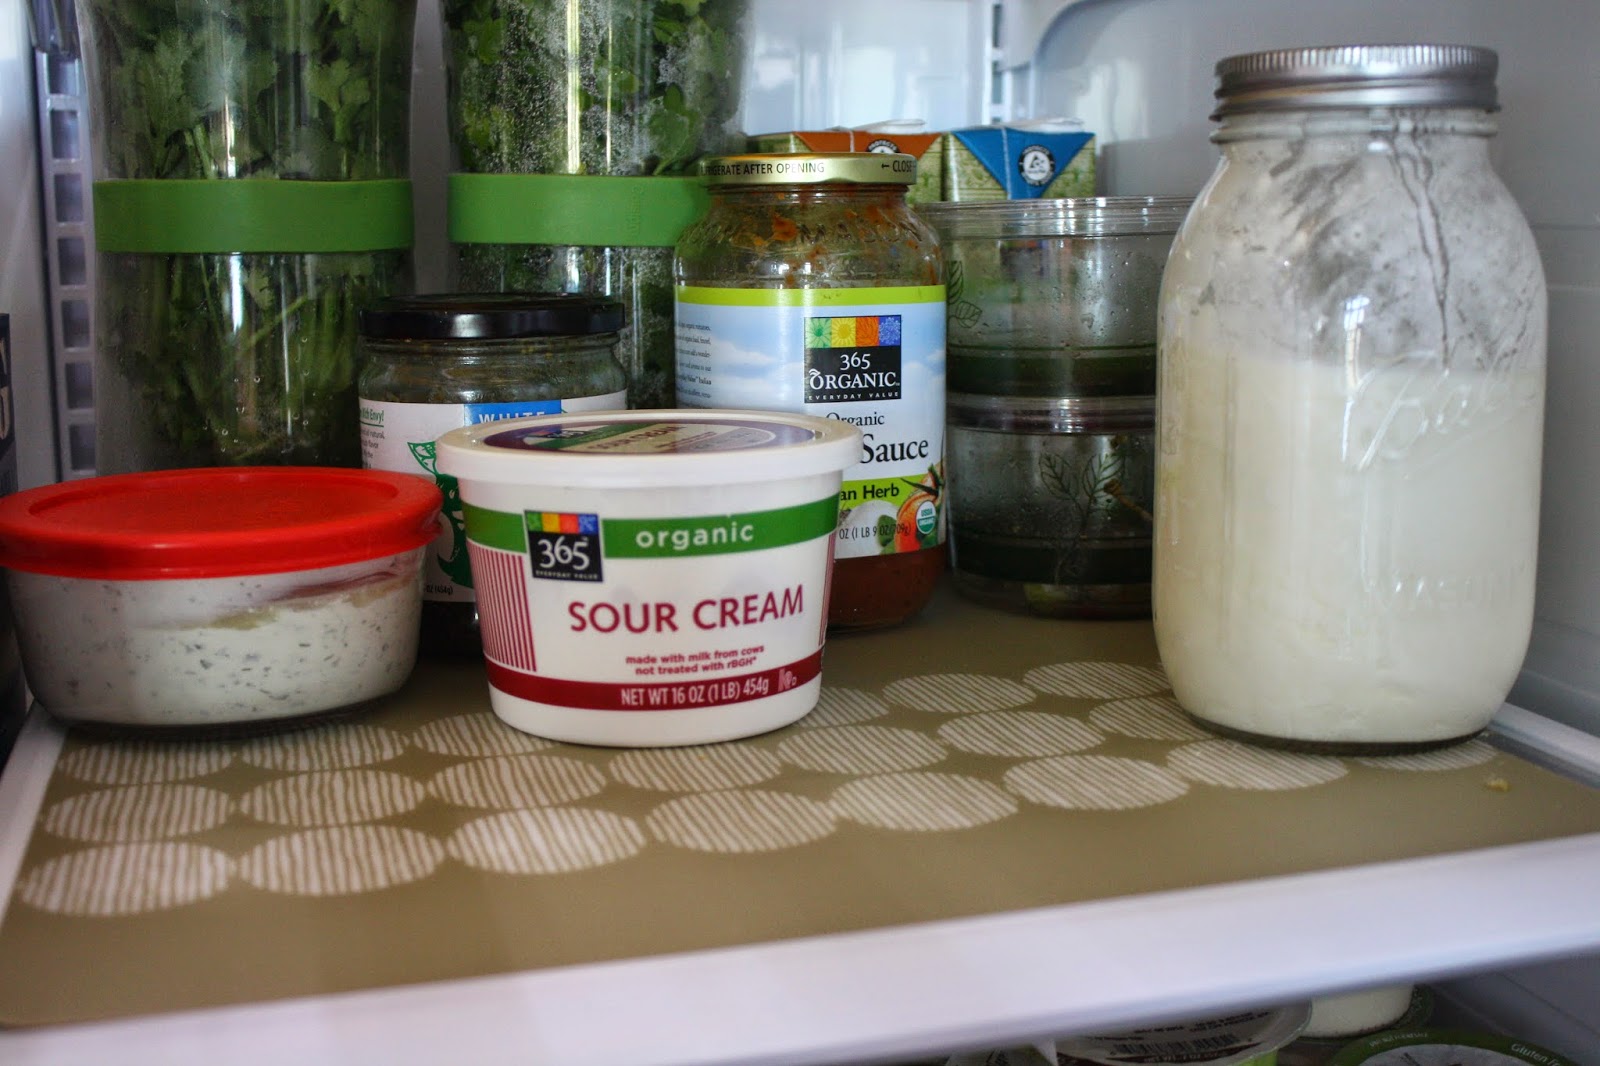
These herb keepers we also got as wedding gifts and still use them regularly. They are great for prolonging the life of herbs. I have two, one for parsley and one for cilantro that I keep in my fridge.


Find here.


Fridge liners
So I first saw these fridge coasters and feel in love, until I saw the price. No thanks! Instead I found clearance plastic (yes plastic….) placements and cut them to size and laid them in my fridge. I love these because I try to wipe out my fridge once a month and these can be rinsed under the sink and put back.


Silicone baking mats
In addition to less plastic in our house, over the years we have learned ways to use less and waste less. A recent gift I received were these silicone placements for baking. Previously, I liked to use parchment paper a lot, but these are great because they are easily cleaned in between use and ready for the next time.

Find here.


Cloth napkins
Another way our family quit wasting was with napkins. I have bought cloth napkins for cheap over the years at places like Home Goods. We usually re-use them a couple times before they are ‘done’ and ready to be washed. We just store them in a drawer and one pile is clean and one pile is gently used. When they are ready for a wash, I add them to the laundry bin and move onto a new one. I have some nicer ones we use for entertaining and even one for my husband and I to take in our lunch bags.


Yogurt maker
Okay, onto appliances. I recently read about this and now use it weekly to make fresh homemade yogurt - SO EASY! Totally worth the money and I love the glass jars that come with the machine.


Find here.


Juicer
Another recent appliance purchase is a juicer. This was actually my husband's idea and we use it weekly. Mondays are our juicing day and we usually make 1-2 large mason jars (pictured above) full and drink on it over the next couple days. Check out my original post for details on juicing and picking an appliance.


Find here.


Popcorn maker
So we don’t use this weekly, but definitely still worth mentioned as my husband is obsessed with it. We quit buying conventional popcorn bags a while back after realizing all the junk in them. We now buy organic popcorn kernels in bulk, which is also much cheaper! Check out the original post on how to use this handy dandy thing. I even have my parents using one.


Find here.


Popsicle molds
Leaving you with a controversial kitchen essential. Man oh man, lots of dirty minded readers out there, when I first posted my homemade popsicles :). Think what you want, but these are great for making homemade snacks or desserts. This was the only stainless steel version that I found when I purchased them, so if you can’t get past the appearance sorry to you :)! There is one similar available now here.


Find here.


Thats it for now! What are your must have kitchen essentials?

~Ashley